
Fact: sticky wax has a tendency to smudge, smear, and otherwise become useless in hot, humid conditions.
Fact: Sticky wax that won't hold a bit makes it very difficult to set split reins.
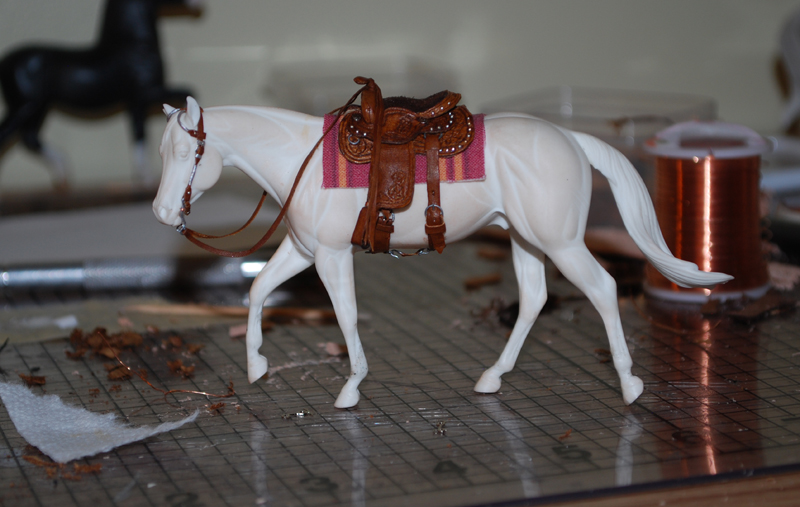
So I did it the easy way.

More than one way to skin a cat, right? I can't say that I'd recommend this particular method on a painted horse or nice OF, but on a body or unpainted horse? Heck yes.
Edited to add: Shoestring Stables uses a twist tie (possibly known as a bread tie) instead of bare wire. What a brilliant idea! The plastic or paper covering provides protection for the horse as long as you don't crank it excessively tight.

In the above photo, I am trying to do a job meant for two hands with one and take a photo of said mayhem with the other. What I've done is dampened my reins with water and then used that weight to help them drape properly. I wrap them around the horn to fall on one side of the saddle and let them dry. When dry, they'll keep their shape fairly well and can be lifted off the horn and placed (with the help of a little sticky wax) in about the same place that a rider would hold them.
Even damp, leather that thin isn't going to have a whole lot of drape to it so I give it a little encouragement. What works really well? Holding both ends above the horn with one hand and using something round and sort of fat (thin highlighter, thick pen, you get the idea) to give the reins a fairly even drape.
Viola! Draped reins, less headache.

As a side note - the near rein has a little crimp in it, just about straight down from the throatlatch. This is because I accidentally soaked that rein. As in, pooling water. I don't recommend that; when they're that wet, attempts at shaping them generally end up looking a little unnatural. Just let it dry out to damp and try it again. Or you can work that little bit of rein around in your fingers after it dries, that'll take care of it, too.
Oh, and another note - my reins are sealed after dyeing. I can't promise that your reins won't spot, discolor, or bleed onto your horse. As with all things - attempt at your own risk. (I've never had anything bad happen, though)
There he is in all of his western pleasure glory!
I've worked extra hours at the print shop this week, been to five or six ball games in four days, and had long music practices at church. I've been going to bed at half-past-exhausted and sleeping later than I'd like. All of that means that this saddle is almost a week past schedule. I'm a little behind on other projects and getting frustrated that this saddle isn't just done already. The pleasure reins were the last thing to make, and I took whatever shots I could while I was waiting for dye to dry this morning. I'll wrap up the session tomorrow morning and then figure out when I'm going to list this thing on Auction Barn. I may hold out and list on Sunday, but regardless I'll post notices in all of the usual places.
I have a few topics for posts in mind, if I can get caught up enough to write them! Hopefully I'll be a little bit more of a regular poster now that ball season is almost over.
Great tips! I use the same "wire noseband" method, but to protect the horse I use one of those paper covered twist ties that you use at the grocery store in the bulk aisle. That way it's unlikely to scratch my horse.
ReplyDeleteWANT! Love your work.
ReplyDeleteShoestring - wow. Twist tie? See, those are the brilliant kind of things people do when they don't make decisions when they're tired and frustrated. Adding that into the post now!
ReplyDeleteVicky, your work is beautiful! I'm definitely honored that you'd want mine :)
Thanks Anna! I don't do mini tack....so have to drool over what others make...lol.
ReplyDeleteI use rubberbands and clothes pins. Clothes pins come in tiny.....
Usually I take a discarded braid and clip it with a clothes pin when I need to hold something in place.